Banana Split Cake: 5 Easy Steps for Perfection!
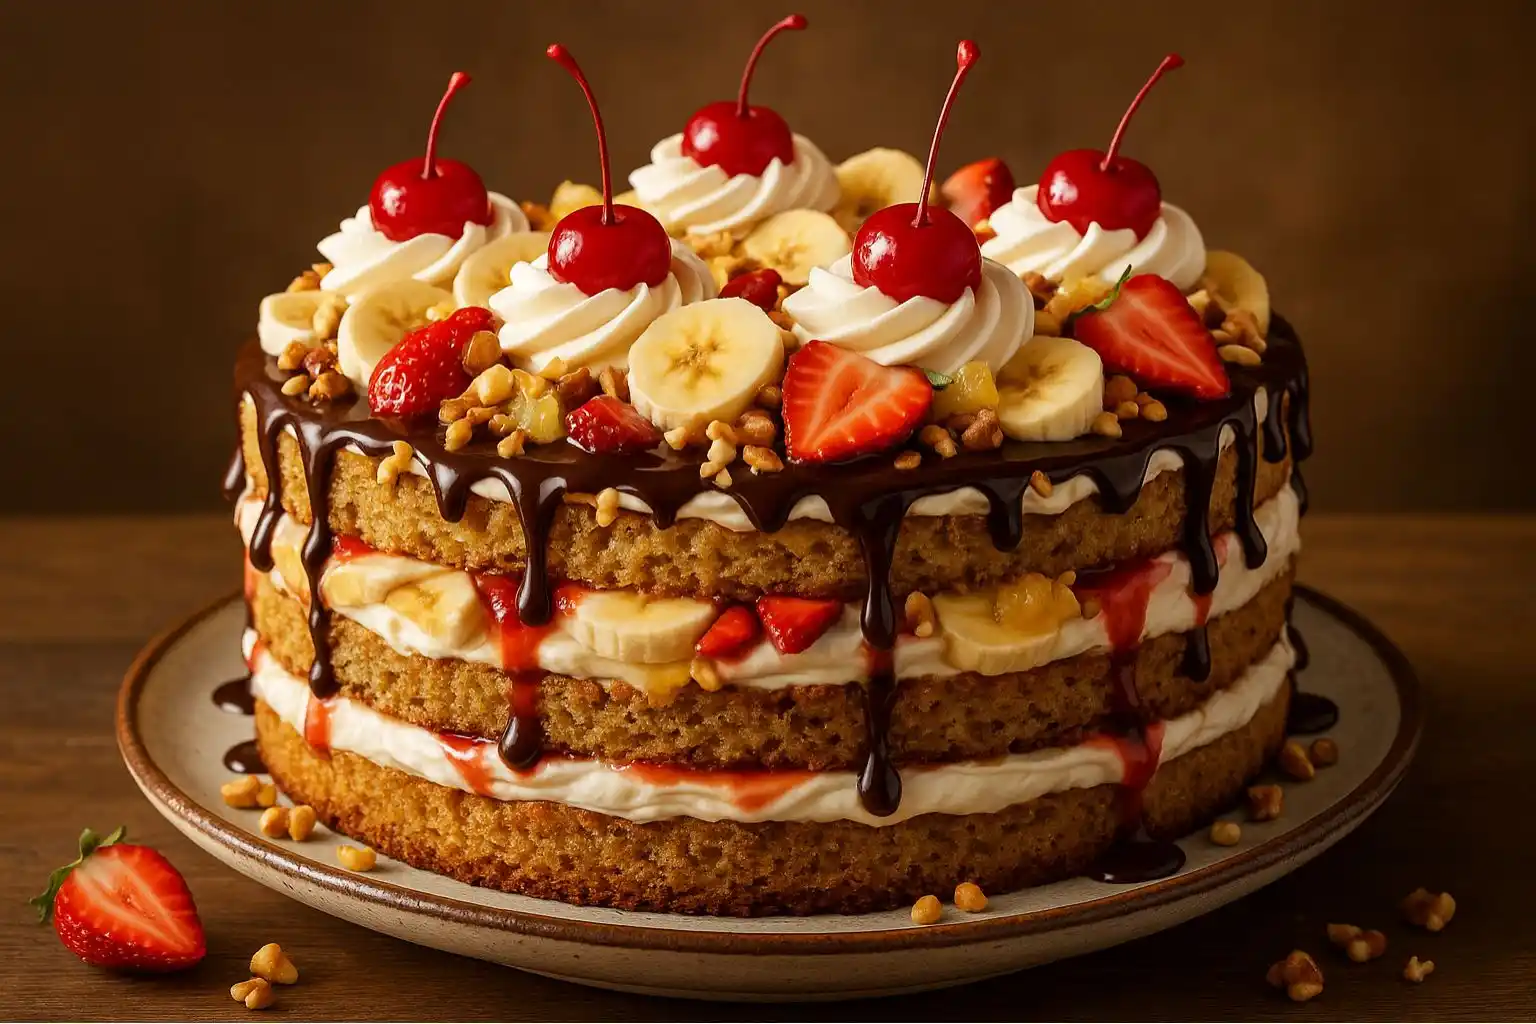
Imagine your favorite ice cream banana split, magically transformed into a cool, creamy, no-bake cake! That’s exactly what a banana split cake is. It captures all those amazing flavors – sweet bananas, tangy pineapple, rich chocolate, juicy cherries, and fluffy whipped cream – but in easy-to-slice dessert form. Forget the oven! This crowd-pleaser comes together with simple layers in a pan and chills until it’s perfectly set. It’s the superstar of potlucks, summer BBQs, holiday gatherings, or anytime you crave a fun, fuss-free treat that tastes like pure happiness. Everyone goes crazy for this banana split cake!
Table of Contents
Ingredients You’ll Need
Gather these simple ingredients to create your delicious banana split cake masterpiece:
- For the Crust:
- 2 cups graham cracker crumbs (about 14-16 full sheets)
- 1/2 cup (1 stick) unsalted butter, melted
- 1/4 cup granulated sugar
- For the Creamy Cheese Layer:
- 16 ounces (2 packages) full-fat cream cheese, softened to room temperature
- 1 cup powdered sugar (confectioners’ sugar)
- For the Fruity Layers:
- 1 (20 ounce) can crushed pineapple, VERY well drained (save the juice for something else!)
- 4-5 medium bananas (slightly underripe is best), sliced
- For the Pudding Layer:
- 2 (3.4 ounce) packages instant vanilla pudding mix
- 3 cups cold milk (whole milk works best for creaminess)
- For the Toppings:
- 1 (8 ounce) container frozen whipped topping (like Cool Whip), thawed – or 2 cups freshly whipped heavy cream
- 1 (10 ounce) jar maraschino cherries, well-drained
- 1/2 cup chopped nuts (walnuts or pecans are classic)
- Chocolate syrup for drizzling
Essential Tools for Preparation
You likely have most of these kitchen helpers already! Here’s what you need to build your banana split cake:
- A 9×13-inch baking dish (glass or metal works great)
- Mixing bowls (various sizes)
- Electric hand mixer or stand mixer (makes the cream cheese layer super smooth)
- Rubber spatula (for scraping and spreading)
- Measuring cups and spoons
- Whisk (for the pudding)
- Knife and cutting board (for the bananas)
- Can opener
- Fine mesh strainer (crucial for draining the pineapple really well!)
How to Make Banana Split Cake in 5 Easy Steps
Get ready for some no-bake fun! Making this stunning banana split cake is surprisingly simple. Just follow these easy steps:
Step 1: Prepare the Crust
This is your foundation! Grab your crust ingredients. In a medium bowl, mix the graham cracker crumbs, melted butter, and granulated sugar together until it looks like wet sand. Pour this mixture into your 9×13-inch dish. Use the bottom of a measuring cup or glass to press it down firmly and evenly across the entire bottom. Pop the dish into the refrigerator for at least 15-20 minutes to let the crust get nice and firm. This chill time is key for a crust that won’t crumble later!
Step 2: Create the Cream Cheese Layer
While the crust chills, make the dreamy cream cheese filling. In a large bowl, beat the softened cream cheese with an electric mixer on medium speed until it’s smooth and creamy (about 1 minute). Gradually add the powdered sugar, beating until everything is completely combined and fluffy (another 1-2 minutes). Be careful not to overbeat! Take the chilled crust out of the fridge. Carefully spread this creamy mixture evenly over the top using your spatula. Smooth it right to the edges. This layer is like the “ice cream” base of your banana split cake.
Step 3: Layer Bananas and Pineapple
Now for the fresh fruit! Slice your bananas into even rounds. Arrange the banana slices in a single layer over the cream cheese mixture, covering it completely. Next, grab your VERY well-drained crushed pineapple. Seriously, press as much liquid out as possible using that strainer – soggy pineapple makes a soggy cake! Sprinkle the drained pineapple evenly over the banana layer. This tangy-sweet combo is pure banana split magic.
Step 4: Add Pudding and Whipped Cream
Time for the vanilla pudding layer! In a medium bowl, whisk together both packages of instant vanilla pudding mix and the cold milk. Whisk constantly for about 2 minutes until it thickens nicely. Don’t wait too long! Pour the pudding evenly over the pineapple layer and gently spread it out with your spatula. Immediately after spreading the pudding, add your whipped topping. Gently spread the thawed whipped topping (or your fresh whipped cream) over the pudding layer. Cover it completely and smoothly. This is getting delicious!
Step 5: Garnish and Chill
The finishing touches! Sprinkle the chopped nuts evenly over the whipped topping. Place the well-drained maraschino cherries across the top – as many as you like! Finally, drizzle chocolate syrup generously over everything. Now, the hardest part: covering the dish and placing it in the refrigerator. Your banana split cake needs to chill for at least 4 hours, but overnight is truly best. This long chill lets all the amazing flavors blend together and makes the cake easy to slice perfectly. Patience pays off!
Pro Tips for the Perfect Banana Split Cake
Want your banana split cake to be absolutely perfect every time? Remember these pro secrets:
- Banana Freshness is Key: Use bananas that are just ripe, maybe even slightly green at the stem. Overripe bananas get mushy and brown quickly in the cake, making it look messy and taste too soft.
- Drain, Drain, Drain! Squeeze every last drop of juice out of that crushed pineapple. Press it in a strainer, even press it with paper towels. Watery fruit = soggy crust = sad cake. Do the same for the cherries!
- Chill Like You Mean It: Four hours is the minimum. For the absolute best texture and flavor harmony, let your banana split cake chill overnight. Trust me, it’s worth the wait!
- Make it Your Own: Allergies or preferences? No problem! Skip the nuts or swap them for colorful sprinkles. Not a pineapple fan? Leave it out (maybe add a little extra banana). Use different pudding flavors like chocolate or banana cream! Make a vegan version with plant-based cream cheese, pudding, and whipped topping. This easy banana split cake recipe is super flexible.
Common Mistakes to Avoid
Even easy desserts can have hiccups. Avoid these common banana split cake blunders:
- Skipping Crust Chill Time: Pressing the crust down firmly and refrigerating it first is non-negotiable. Skipping this leads to a crumbly mess when you try to cut slices.
- Over-Mixing the Cream Cheese: Beat it just until smooth and combined with the sugar. Over-beating incorporates too much air, which can make the layer bubbly or cause it to crack later.
- Adding Toppings Too Early: The nuts, cherries, and chocolate syrup should only go on after the whipped cream layer is spread and right before it goes into the fridge for the long chill. Adding them earlier makes slicing messy and can cause toppings to sink.
- Not Draining Fruit Enough: We can’t say it enough! Excess liquid is the enemy of a perfect banana split cake structure. Drain thoroughly!
Serving and Storage Suggestions
Your stunning banana split cake is ready to shine!
- Serving: Use a sharp knife dipped in hot water (and wiped dry) for clean cuts. Slice into squares. For an extra-decadent treat, serve each piece with a small scoop of vanilla ice cream on the side – true banana split style!
- Storage: Keep your banana split cake covered tightly in the refrigerator. It stays fresh and delicious for 3-4 days. The bananas will start to brown slightly after day 2, but it will still taste amazing. Freezing isn’t ideal because the texture of the bananas and whipped topping can change, but if you must, freeze it before adding the fresh banana slices and final toppings (whipped cream, cherries, nuts, syrup). Thaw overnight in the fridge and then add the bananas and toppings before serving.
Why You’ll Love This Banana Split Cake
Seriously, what’s not to love about this banana split cake? Let us count the ways:
- No Baking Required! Perfect for hot summer days or when you just don’t want to turn on the oven.
- Total Crowd-Pleaser: Kids adore it, adults devour it. It disappears fast at any gathering.
- Easy Peasy: Simple ingredients, straightforward steps – even beginner bakers look like pros.
- Customizable Fun: Make it your own with different fruits, toppings, or pudding flavors.
- Make-Ahead Magic: Needs that long chill, making it the ultimate stress-free dessert for parties.
- Pure Nostalgia: It tastes like a bite of your favorite childhood ice cream sundae, but in cake form!
It’s more than just a dessert; it’s a guaranteed smile-maker. This easy banana split cake recipe is a keeper you’ll turn to again and again.
Ready to wow your friends and family? Grab your ingredients and make this amazing no-bake banana split cake today! We’d LOVE to see your masterpiece! Snap a picture of your finished creation and share it with us in the comments below or tag us on social media. Happy baking (well, chilling!)!