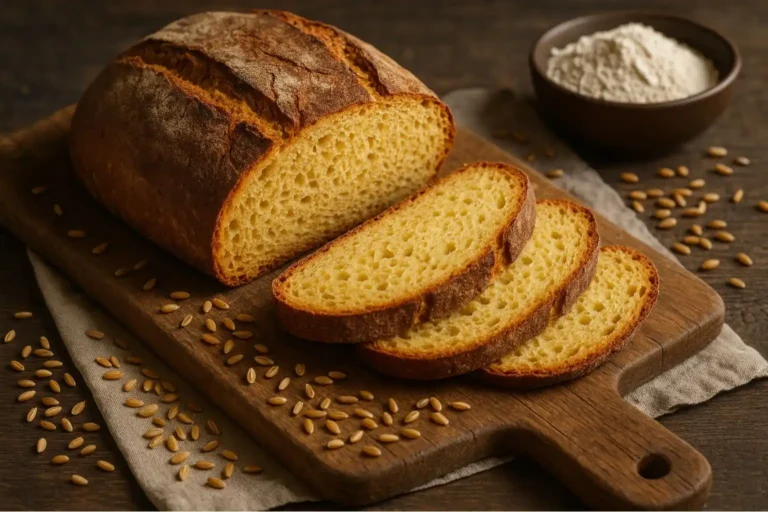
Bubble Bread: 5 Secrets for Perfect Pull-Apart Goodness

Introduction: The Irresistible Charm of Bubble Bread
Picture this: a warm, golden loaf lands on your table. You reach in, gently pull apart a soft, buttery bubble, and steam rises with the most inviting smell. That’s the magic of perfect Bubble Bread! It’s fun, shareable, and downright delicious. But… have you ever tried making it, only to end up with dense bubbles, a doughy center, or bread that just won’t pull apart nicely? Maybe the flavor fell flat, or it burned on top while staying raw inside. Frustrating, right?
Don’t worry! Getting that dreamy, pull-apart Bubble Bread isn’t as hard as you think. Forget complicated tricks. Today, I’ll share 5 simple secrets used by the pros. These game-changers focus on your dough’s feel, rising time, gentle touch, pan choice, and baking smarts. Ready to bake your best Bubble Bread ever? Let’s unlock those secrets!
Table of Contents
Why These Bubble Bread Secrets Matter
You might wonder, “Why fuss over these details?” Because these 5 secrets transform okay Bubble Bread into something spectacular! Get them right, and you’ll achieve:
- Light & Airy Bubbles: No more heavy, doughy lumps!
- Amazing Flavor: Time and technique build deep, yummy taste.
- Perfect Golden Crust: Crisp outside, soft inside.
- Easy Pull-Apart Fun: Every bubble separates beautifully.
It’s not just magic; there’s a little science too! Letting the dough rise fully lets yeast create gas (making bubbles strong) and develop tasty flavors. Gentle handling keeps those precious air pockets safe. The right pan and heat make sure everything cooks evenly. Think of these secrets as your friendly baking coach!
Secret #1: Master the Dough Consistency (It’s Not Just Sticky!)
The journey to perfect Bubble Bread starts with your dough’s feel. This is the BIG foundation!
The Goldilocks Zone for Bubble Bread Dough
Your Bubble Bread dough needs to be just right. Imagine dough that’s:
- Very Soft and Pliable: Easy to stretch.
- Slightly Tacky: It might very lightly stick to clean fingers, but shouldn’t leave lots of dough behind.
- NOT Super Sticky: If it’s gloopy and sticks everywhere, it needs a tiny bit more flour.
- NOT Stiff or Dry: If it feels firm or cracks, it needs a splash more liquid.
Why does this matter SO much?
- Too Dry = Dense Bubbles: Not enough moisture means bubbles can’t puff up light and airy. Your bread will be heavy.
- Too Wet = Collapsed Structure: Super sticky dough spreads too much and bubbles can deflate easily. It might bake unevenly.
Pro Tip: Focus on feel, not just the recipe’s flour amount! Humidity, flour type, even your kitchen’s temperature change things. Start with slightly less flour than listed. Mix, then add flour just 1 tablespoon at a time until you hit that soft, slightly tacky sweet spot. It should pull away from the bowl mostly cleanly but still feel super soft.
Secret #2: The Magic of the First Rise (Patience is Key!)
Okay, dough’s mixed! Now comes a test of patience – the first rise. Don’t rush this step for your Bubble Bread!
Letting the Flavor & Texture Develop
This quiet time is when the magic happens inside your dough:
- Yeast Gets Busy: The yeast eats sugars and burps out gas (mostly carbon dioxide). This gas gets trapped, making the dough puff up and creating the bubbles you love!
- Gluten Relaxes & Strengthens: The dough’s proteins form a stretchy network. This lets the dough expand without tearing and gives your bread structure.
- Flavor Builds: Chemical reactions happen, creating deeper, more complex, delicious bread flavor. Rushing this means bland Bubble Bread.
Your Goal: Let the dough rise until it’s truly doubled in size. Don’t guess! Poke it gently with a floured finger:
- If the indentation springs back quickly, it needs more time.
- If the indentation stays or fills in very slowly, it’s ready!
Pro Tip: Find a warm, cozy spot! Ideal is around 75-80°F (24-27°C). Try:
- Turning your oven light on (oven OFF!) and placing the bowl inside.
- Placing the bowl on top of the fridge.
- Sitting it near (not on!) a radiator. Cover the bowl lightly with oiled plastic wrap or a damp towel to prevent drying.
Secret #3: Gentle Shaping for Maximum Air Pockets
Your dough is beautifully risen – full of delicate air bubbles. Now, treat it like a fragile cloud! Rough handling is the enemy of light Bubble Bread.
Handle with Care for Light & Airy Bubbles
Think of those air pockets like tiny balloons inside your dough. Punching it down hard or roughly kneading pops those balloons! We want to keep them.
The Gentle Technique:
- Turn Out Gently: Tip the risen dough onto a very lightly floured surface. Don’t slam it down.
- Divide Softly: Use a bench scraper or sharp knife to cut the dough into pieces – don’t tear it. Size depends on your recipe (often golf ball to lemon-sized for Bubble Bread).
- Roll Lightly: Cup your hand lightly over a piece of dough. Gently roll it in tiny circles on the counter without pressing down hard. You just want it to form a loose ball shape, sealing the bottom. It shouldn’t be tight or smooth like a dinner roll!
Pro Tip: Use minimal flour on your hands and surface! Too much flour makes the dough dry and prevents the bubbles from sticking together later. A light dusting is enough. The dough should still feel a little tacky.
Secret #4: The Power of the Pan (Size & Prep Matter!)
Where you bake your Bubble Bread is super important! The wrong pan can ruin everything.
Choosing and Preparing Your Bubble Bread Vessel
Pan Size is CRITICAL:
- Too Big: The dough spreads out instead of climbing up. You get a flat, wide bread with small bubbles and likely overcooked edges.
- Too Small: The dough has no room to expand. The center stays doughy and dense while the top might burn. Crowded bubbles won’t cook evenly.
The Perfect Pan for Pull-Apart Bliss:
- Bundt Pan or Tube Pan: Classic choice! Creates a beautiful ring shape and promotes even heat circulation. (10-12 cup capacity is usually great).
- Deep Dish Pie Plate: Works well for a more free-form loaf. Make sure it’s deep enough (at least 2 inches).
- 9×5 Inch Loaf Pan: Can work, but fill it only 2/3 full. Bubbles might stack more than pull apart sideways.
Grease Like You Mean It!
This is non-negotiable for easy Bubble Bread release:
- Butter is Best: Use softened butter and a pastry brush (or your fingers!) to generously coat every single nook and cranny. Get the center tube and all the way up the sides! Don’t be shy.
- Spray Option: A good quality baking spray with flour (like Baker’s Joy) can work well, especially in intricate pans like Bundts. Spray thoroughly!
- Why? Butter/flour creates a barrier and gives the dough something to grip as it rises, preventing sticking. Skimping = torn bread!
Secret #5: Baking Hot & Watching the Clock (Not the Oven Light!)
You’re almost there! Baking is the final step to golden Bubble Bread perfection.
Achieving Golden Perfection Without Overbaking
1. Preheat PROPERLY: Get your oven fully up to temperature before the pan goes in. This gives your bread an instant “oven spring” – a final burst of rising. Putting it in a cold oven leads to dense bread. Give it 15-20 minutes after the beep!
2. The Right Heat: Most Bubble Bread recipes bake well around 350°F – 375°F (175°C – 190°C). This heat is hot enough to set the structure quickly and brown the crust beautifully without burning before the inside cooks. Follow your specific recipe’s temp!
3. The TRUE Test for Doneness (Forget Just the Timer!):
- Golden Brown Color: The top should be a deep, beautiful golden brown.
- Internal Temperature: This is the most reliable test. Insert an instant-read thermometer into the center of the bread (avoiding the pan bottom). You want it to read 190°F – 200°F (88°C – 93°C). At this temp, the starches are fully set, and you know it’s cooked through.
Crucial Tip: Resist the Peek! Do NOT open the oven door during the first 20-25 minutes of baking! That blast of cold air can make your beautiful rising bread collapse. Trust the process, your oven light, and the timer until near the end.
Avoid These Common Bubble Bread Blunders
Even knowing the secrets, it’s easy to slip up! Here’s a quick cheat sheet of what not to do:
- Over-Flouring the Dough: Creates dry, dense bubbles. Use flour very sparingly.
- Rushing the First Rise: Leads to weak bubbles and bland flavor. Wait for true doubling!
- Over-Handling/Kneading After the Rise: Squishes out all the precious air. Be gentle!
- Using the Wrong Pan Size: Causes uneven baking, doughy centers, or flat bread. Choose wisely!
- Undercooking: Results in gummy, doughy centers that won’t pull apart cleanly. Use the thermometer!
- Overcooking: Makes dry, tough bread and burnt edges.
- Not Greasing the Pan Enough: Heartbreak! Your beautiful bread gets stuck. Grease generously!
Taking Your Bubble Bread Further: Flavor Twists & Tips
Mastered the basic perfect Bubble Bread? Let’s get creative!
Savory Sensations:
- Garlic-Herb Butter: Mix melted butter with minced garlic, parsley, rosemary, and a pinch of salt. Brush generously between layers and over the top before baking.
- Cheesy Pull-Apart: Toss dough balls with shredded cheddar, mozzarella, or Parmesan (or a mix!) before placing in the pan. Add a sprinkle on top.
- Everything Bagel Bliss: Brush dough balls with egg wash or water, then roll them in Everything Bagel Seasoning before stacking.
Sweet Treats:
- Classic Cinnamon-Sugar: Roll dough balls in a mix of cinnamon and sugar. Pour any extra mixed with melted butter over the top before baking.
- Apple Pie Spice: Add cinnamon, nutmeg, and allspice to your sugar mix.
- Vanilla Glaze: Mix powdered sugar, a splash of milk, and vanilla extract. Drizzle over cooled sweet Bubble Bread.
Adding Mix-Ins (Nuts, Raisins, Chocolate Chips):
- Keep it Light: Don’t overload! Too many mix-ins weigh down the dough.
- Fold In Gently: Add them during the last minute of mixing the dough, or gently fold them in after the first rise before shaping, being careful not to deflate the dough much.
- Coat Sticky Bits: Toss raisins or chocolate chips in a little flour first to prevent sinking.
Storing & Reheating Your Masterpiece:
- Best Fresh: Bubble Bread is always best the day it’s made.
- Storing: Cool completely. Store airtight at room temperature for 1-2 days.
- Reheating: Wrap loosely in foil and warm in a 300°F (150°C) oven for 10-15 minutes until heated through. Microwaving can make it rubbery.
Your Bubble Bread Questions Answered (FAQs)
Can I use instant yeast instead of active dry?
Absolutely! Instant yeast is a great swap. You usually use the same amount as active dry yeast. The big difference? You can mix instant yeast right in with your dry ingredients – no need to proof it in warm water first. Just make sure your liquid isn’t scalding hot (around 110°F/43°C max is safe).
Can I make Bubble Bread ahead?
Yes! You have two good options:
- Refrigerate the Dough: After the first rise (or sometimes after shaping), cover tightly and refrigerate for up to 24 hours. Let it come close to room temperature before baking (may need a slightly longer bake time).
- Bake Ahead: Bake the bread completely, cool, and store airtight. Reheat gently (wrapped in foil in the oven) before serving for best texture. It won’t be quite as amazing as fresh, but still tasty!
Why didn’t my bubbles pull apart easily?
Two main culprits:
- Undercooked: The center wasn’t fully baked, making the dough gummy and sticky. Use that thermometer next time!
- Insufficient Greasing: The bubbles fused together during baking because they stuck to the pan or each other. Grease much more generously next time, especially between layers if your recipe calls for it.
Can I freeze Bubble Bread?
Yes! Freezing works well:
- Cool Completely: This is crucial to prevent sogginess.
- Wrap Tightly: Wrap the whole loaf or individual portions first in plastic wrap, then in foil or a freezer bag. Squeeze out air.
- Freeze: For up to 2-3 months.
- Thaw & Reheat: Thaw overnight in the fridge or at room temperature. Reheat wrapped in foil in a 300°F (150°C) oven until warm throughout (15-25 mins depending on size).
Ready to Bake Your Best Bubble Bread Ever?
There you have it! The 5 simple secrets that separate okay Bubble Bread from absolute, pull-apart perfection: mastering the dough feel, respecting the rise, gentle shaping, choosing and greasing the right pan like your bread’s life depends on it (because it does!), and baking smart with a thermometer.
These aren’t just random tips; they’re the keys to unlocking light, airy bubbles, incredible flavor, and that satisfying pull every single time. Forget the dense disappointments and uneven bakes of the past. You’ve got the knowledge now!
So, what are you waiting for? Grab your favorite Bubble Bread recipe (or find a new one!), put these secrets into action, and experience the magic for yourself. Imagine pulling apart those perfect, golden bubbles and sharing the deliciousness. Bake your best batch yet this weekend – you’ve totally got this! Don’t forget to come back and tell me how it went! Happy baking!


