Perfect Kalamata Bread: Homemade Loaves in 5 Easy Steps!
Introduction to Kalamata Bread
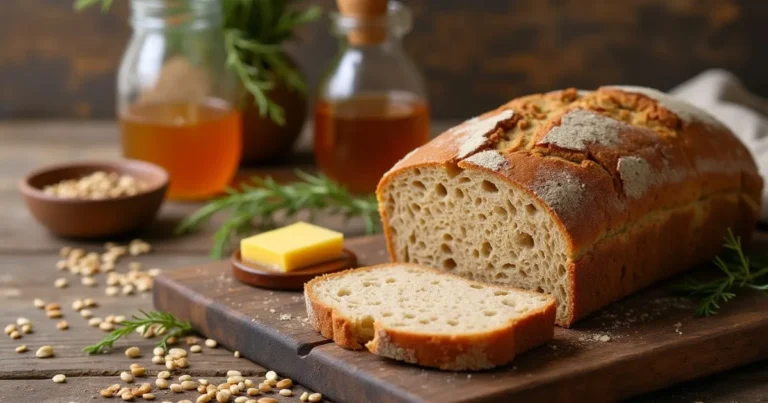
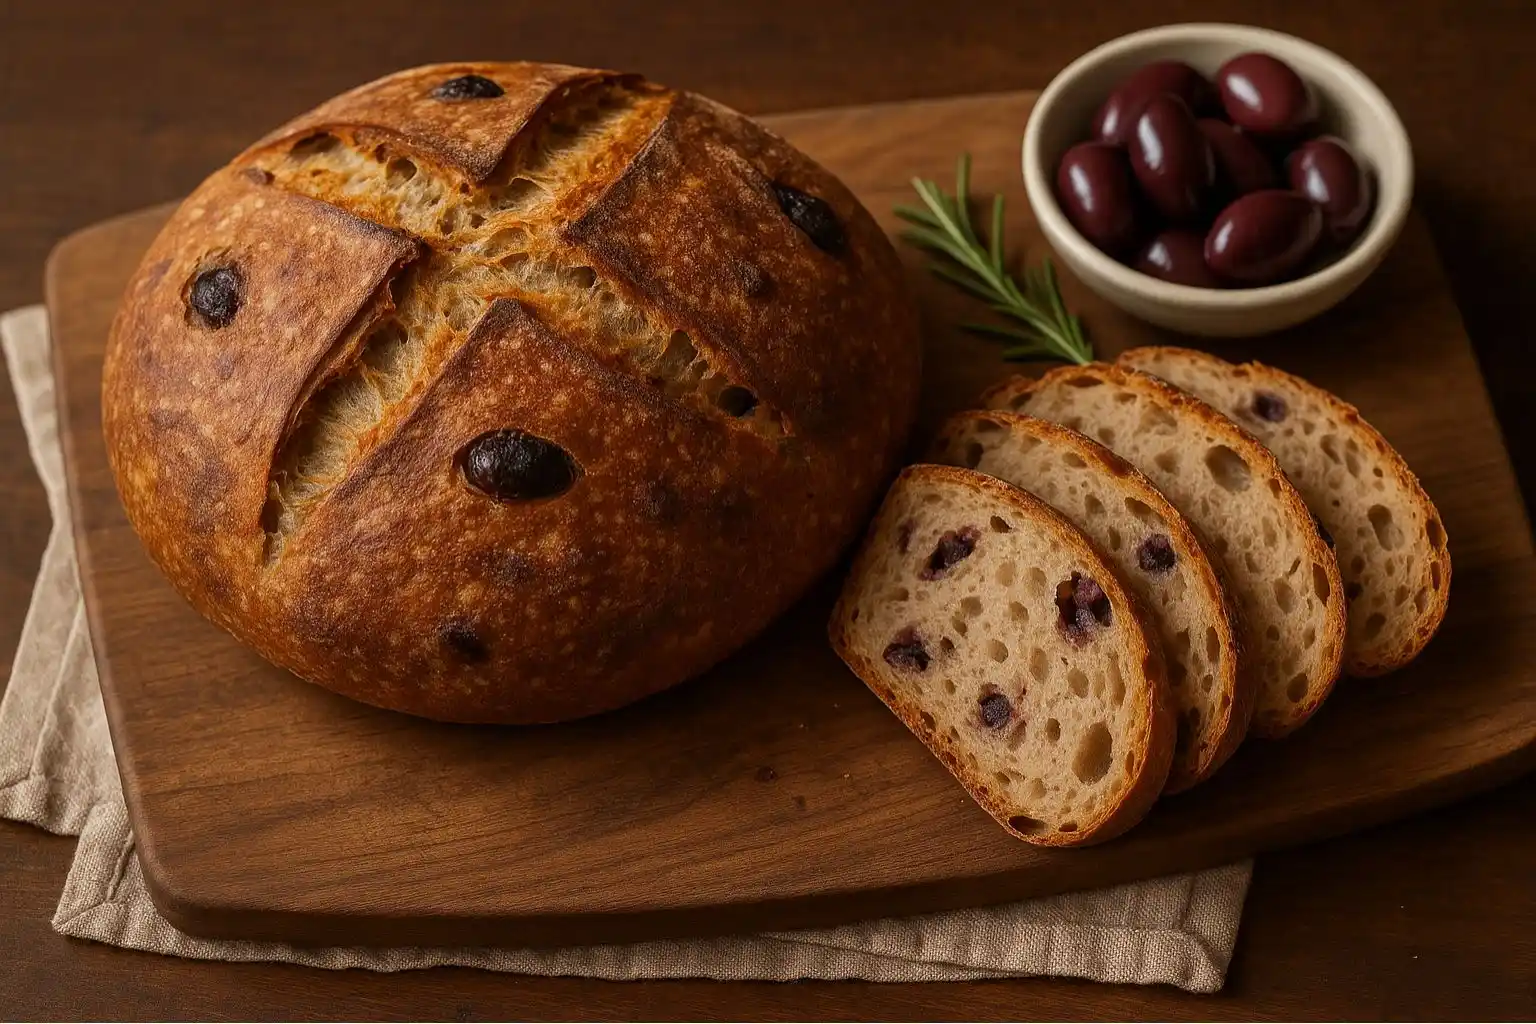
Picture this: you walk into your kitchen, and the warm, comforting smell of freshly baked bread fills the air. But this isn’t just any bread. It’s studded with delicious, tangy Kalamata olives! That’s the magic of Kalamata Bread. This artisan loaf is a simple yet stunning homemade bread featuring those famous Greek olives. Why bake it yourself? Because you control the flavor (more olives, please!), skip the weird preservatives, and get that amazing feeling of pulling your very own creation out of the oven. Trust me, once you taste homemade Kalamata Bread, store-bought just won’t compare. Let’s get baking!
Table of Contents
Why You’ll Love This Kalamata Bread Recipe
This Kalamata Bread recipe is a total winner. It’s easier than you think and delivers incredible results every time. Here’s why it’s about to become your new favorite:
Flavor & Texture Highlights
- Bold Olive Goodness: The star of the show! Salty, briny Kalamata olives burst in every bite.
- Perfect Crumb: Inside, you’ll find a satisfyingly chewy texture that’s just right.
- Golden, Crispy Crust: The outside bakes up beautifully crisp and golden brown. It’s the perfect contrast to the soft inside.
Simplicity & Flexibility
- Beginner-Friendly: Don’t be intimidated! We break it down into clear, easy steps. No fancy skills needed.
- Make It Your Own: Love herbs? Toss in some rosemary or thyme. Craving cheese? Fold in feta or Parmesan. This homemade olive bread is your canvas!
Health Perks
- Olive Power: Kalamata olives are packed with healthy fats and antioxidants – way better than processed stuff!
- Know Your Ingredients: Baking at home means no hidden sugars or preservatives. Just pure, simple goodness.
Essential Ingredients for Authentic Kalamata Bread
Gathering great ingredients is the first step to amazing Kalamata Bread. Here’s what you need:
Core Components
- Flour: 3 1/2 cups (about 500g) bread flour or all-purpose flour (bread flour gives a chewier crumb).
- Yeast: 2 1/4 teaspoons (1 standard packet) active dry yeast or instant yeast.
- Water: 1 1/4 cups (300ml) warm water (around 105-110°F / 40-43°C – not hot!).
- Salt: 1 1/2 teaspoons fine sea salt or kosher salt (crucial for flavor).
- Olive Oil: 2 tablespoons extra virgin olive oil (plus a little extra for the bowl).
The Star: Kalamata Olives
- Amount: 1 cup (about 150g) pitted Kalamata olives.
- Prep is Key:
- Make sure they are pitted.
- Give them a quick rinse under cool water to remove excess brine.
- Chop them roughly into quarters or halves. Don’t mince them – you want nice chunks!
- Pat them VERY dry with paper towels. This is super important to keep your dough from getting soggy!
- Quality Matters: Jarred Kalamata olives in brine usually taste better and have a firmer texture than canned ones. Look for them near the pickles or Mediterranean foods.
Pro Tip:
- Flour Swap: Substitute up to 1 cup of the all-purpose/bread flour with whole wheat flour for a nuttier flavor and extra fiber. Add 1-2 tbsp extra water if the dough feels stiff.
- Sourdough Twist: For a tangy sourdough Kalamata Bread, replace 1 cup of the water and 1 1/2 cups of the flour with 1 cup (about 250g) of active, bubbly sourdough starter. Adjust water/flour slightly as needed during mixing.
Tools You’ll Need
You don’t need a bakery’s worth of equipment for this artisan bread baking adventure. Here’s the list:
Basic Equipment
- Large Mixing Bowl: For bringing your dough together.
- Wooden Spoon or Dough Whisk: For initial mixing (your hands work too!).
- Clean Work Surface: Lightly floured, for kneading and shaping.
- Dough Scraper (Bench Scraper): Super handy for dividing dough, scraping the bowl, and cleaning your surface.
- Kitchen Towel or Plastic Wrap: To cover the dough while it rises.
- Loaf Pan: Standard 9×5 inch (23×13 cm) pan is perfect. Give it a light coating of oil or non-stick spray.
Optional Upgrades
- Stand Mixer with Dough Hook: Makes kneading effortless, especially if you make bread often.
- Kitchen Scale: Weighing ingredients (especially flour) is the most accurate way to bake and leads to the best results.
- Baking Stone or Steel: Placed in the oven while preheating, it helps create a fantastic, professional-level crust.
- Lame or Razor Blade: For making clean, deep scores (cuts) on top of your loaf before baking, which helps it rise beautifully.
- Instant-Read Thermometer: Takes the guesswork out of checking if your bread is perfectly baked inside (aim for 190-200°F / 88-93°C).
How to Bake Homemade Kalamata Bread in 5 Steps
Ready to make magic? Follow these simple steps for perfect Kalamata Bread:
Step 1: Mix & Knead the Dough
- Activate Yeast (If using Active Dry): In your large bowl, whisk the warm water, a pinch of sugar (optional, helps yeast), and active dry yeast. Let it sit for 5-10 minutes until foamy. (Skip this step if using Instant Yeast – just add it directly with the flour).
- Combine Dry Ingredients: Add the flour and salt to the bowl (or to the yeast water if activated). If using Instant Yeast, add it now too.
- Add Wet & Mix: Pour in the olive oil. Stir everything together with a spoon or dough whisk until a shaggy dough forms.
- Add the Star: Gently fold in the chopped, well-dried Kalamata olives. Try to distribute them evenly without crushing them.
- Knead!
- By Hand: Turn the dough out onto a lightly floured surface. Knead for 8-10 minutes. Push it away with the heel of your hand, fold it over, give it a quarter turn, and repeat. It will start sticky but become smooth and elastic. Add tiny bits of flour only if it’s unmanageably sticky.
- By Mixer: Fit the dough hook. Knead on medium-low speed for 5-7 minutes until smooth and elastic. Scrape down the bowl if needed.
- Check the Dough: It should feel smooth, slightly tacky (but not sticky), and spring back when gently poked. You should be able to stretch a small piece thinly enough to see light through it (the “windowpane test”).
Step 2: First Rise (Bulk Fermentation)
- Oil Bowl & Dough: Lightly oil a clean bowl (or use the mixing bowl, cleaned). Place your kneaded dough ball in it.
- Cover: Drizzle a tiny bit of oil over the dough ball and turn it to coat lightly. This prevents drying. Cover the bowl tightly with plastic wrap or a damp kitchen towel.
- Let it Rise: Place the bowl in a warm, draft-free spot (like a turned-off oven with the light on, or near a radiator). Let the dough rise until doubled in size. This usually takes 1 to 1.5 hours, depending on your kitchen’s warmth. Don’t rush it!
Step 3: Shape the Loaf
- Gently Deflate: Once doubled, gently punch down the dough to release the big air bubbles. Be kind – you don’t want to squish all the gas out.
- Turn Out: Turn the dough out onto a very lightly floured surface.
- Form: Shape it into a tight loaf:
- Flatten the dough gently into a rough rectangle.
- Fold the long sides towards the center, like folding a letter.
- Starting at one short end, tightly roll the dough up into a log.
- Pinch the seam closed and tuck the ends under slightly.
- Seam Down: Place the shaped loaf seam-side down into your prepared loaf pan.
Step 4: Second Rise (Proofing)
- Cover Again: Loosely cover the loaf pan with plastic wrap or a damp towel.
- Final Rise: Let it rise again in a warm spot. This time, it should rise just above the rim of the pan, usually taking 30-60 minutes.
- The Finger-Dent Test: Gently poke the side of the dough with a floured finger. If the indentation slowly springs back about halfway, it’s perfectly proofed and ready to bake. If it springs back quickly, it needs more time. If it doesn’t spring back at all, it’s over-proofed (bake immediately!).
Step 5: Bake to Golden Perfection
- Preheat: About 30 minutes before baking, preheat your oven to 375°F (190°C). If using a baking stone/steel, place it on a middle rack now.
- Score: Right before baking, use a sharp knife, lame, or razor blade to make one long slash (about 1/2 inch deep) down the center of your loaf. This controls how it expands in the oven.
- Create Steam (Optional but Recommended for Crust): Place a small, empty metal baking pan (like a loaf pan) on the bottom rack of the oven while preheating. When you put your bread in, carefully pour 1 cup of hot water into this pan and quickly close the oven door. The steam helps create that beautiful crisp crust!
- Bake: Place your loaf pan on the middle rack (or on the baking stone if using). Bake for 35-45 minutes.
- Check Doneness: The bread is done when it’s deeply golden brown all over. Carefully lift it out of the pan (use oven mitts!) and tap the bottom firmly. It should sound hollow! For extra certainty, an instant-read thermometer inserted into the center should read 190-200°F (88-93°C).
- Cool: This is the hardest part! Transfer the baked Kalamata Bread to a wire rack and let it cool completely (at least 1 hour) before slicing. Cutting too soon makes the inside gummy. Let those flavors settle!
Expert Tips for Flawless Kalamata Bread
Want bakery-level results at home? These pro tips make all the difference:
Olive Handling Secrets
- Dry, Dry, Dry: Seriously, pat those chopped olives until they feel almost dry. Wet olives = soggy dough pockets and uneven baking. This is the #1 tip!
- Flour Dusting (Bonus Tip): Lightly toss your dried, chopped olives in a teaspoon of flour before folding them in. This helps them stick to the dough better and prevents sinking.
- Fold Gently: When adding olives to the dough, fold them in gently during the last minute of kneading or while shaping. Avoid vigorous mixing that breaks them down.
Crust & Crumb Optimization
- Steam is Your Friend: That trick with the pan of hot water? It’s gold for a crispy, shiny crust. Do it!
- Score Deeply: Don’t be shy with your slash. A good 1/2-inch deep cut allows the bread to expand properly without bursting randomly.
- Baking Stone Power: Preheating a stone or steel gives your loaf an intense initial heat boost, leading to better oven spring (that initial rise in the oven) and a crisper bottom crust.
- Cool Completely: Resist the urge to slice! Letting the bread cool allows the crumb structure to set, giving you perfect slices instead of a gummy mess.
Troubleshooting Common Issues
- Dense or Heavy Loaf:
- Over-proofed? Did the dough collapse easily or fail the finger-dent test? Next time, shorten the second rise.
- Under-kneaded? The dough wasn’t developed enough to hold gas. Knead longer next time until truly smooth and elastic.
- Yeast Issue? Check expiration date. Was water too hot (kills yeast) or too cold (slows it down)? Ensure a warm rising spot.
- Bland Flavor:
- Salt Check: Did you measure the salt correctly? Salt enhances all flavors.
- Olive Ratio: Use the full cup! Taste your olives – are they flavorful? Higher quality makes a difference.
- Insufficient Baking: A fully baked loaf develops deeper flavors. Ensure internal temp reaches 190°F+.
- Olives Sunk to the Bottom:
- Wet Olives: The most common culprit! Pat them drier next time.
- Added Too Early: Fold them in very last, just before the final shaping/kneading is complete.
- Flour Dusting: Try tossing them in flour before adding.
Serving, Pairing & Storing Your Kalamata Bread
Your beautiful homemade Kalamata Bread is ready to shine!
Serving Suggestions
This flavorful loaf is incredibly versatile! Here are some delicious ways to enjoy it:
- Simply Slathered: Fresh out of the oven (once cooled!), thick slices with good butter or high-quality extra virgin olive oil for dipping is perfection.
- Mediterranean Feast: Pair it with hummus, baba ganoush, tzatziki, or a flavorful tapenade. It’s the ultimate dipper!
- Soup’s Best Friend: Dunk it into hearty minestrone, lentil soup, or a rich tomato soup. It soaks up broth beautifully.
- Cheese & Charcuterie Board Star: Serve thick slices alongside sharp cheeses (like aged cheddar or manchego), creamy cheeses (like goat cheese or brie), cured meats (salami, prosciutto), and some grapes or figs.
- Sandwiches & Toast: Makes amazing gourmet sandwiches (think turkey & havarti, roasted veggie) or incredible avocado toast. The olives add such a great flavor punch!
Storage Guide
- Room Temperature: Store your cooled Kalamata Bread in a paper bag or loosely wrapped in a clean kitchen towel at room temperature for up to 2-3 days. A plastic bag will soften the crust quickly.
- Freezing for Longevity: Slice the loaf first (or leave whole if preferred). Wrap tightly in plastic wrap, then place in a freezer bag, squeezing out as much air as possible. Freeze for up to 3 months.
- Reheating:
- Slices: Pop frozen slices directly into a toaster or toaster oven until warmed through and slightly crisp.
- Whole Loaf: Thaw at room temperature, wrapped in foil, then unwrap and warm in a 350°F (175°C) oven for 10-15 minutes to refresh the crust. For frozen, bake wrapped in foil at 350°F (175°C) for 20-25 minutes, then unwrap and bake 5-10 minutes more to crisp up.
Frequently Asked Questions
Let’s answer those last-minute questions about your Kalamata Bread adventure:
Can I use other olives?
Absolutely! While Kalamata olives give that classic, robust flavor, feel free to experiment. Green olives, Niçoise olives, or a mix can be delicious. Just remember to pit them, rinse if very salty, and pat them very dry! The flavor profile will change, but it will still be delicious homemade olive bread.
How do I prevent olives from sinking?
This is a common one! Here’s the winning strategy:
- Pat Chopped Olives DRY: Excess moisture makes them heavy.
- Lightly Coat in Flour: Toss the chopped, dried olives with a teaspoon of flour before adding them. The flour helps them grip the dough.
- Add Them Late: Fold the olives in during the very last minute of kneading or while you’re shaping the loaf. Don’t mix them in right at the beginning.
Can I make this vegan?
Great news! This Kalamata Bread recipe is naturally vegan! The ingredients are just flour, water, yeast, salt, olive oil, and olives. Just double-check your specific olive brand if you follow a strict vegan diet, but Kalamatas are typically just olives, water, salt, and sometimes vinegar.
Conclusion: Your Homemade Kalamata Bread Journey
Well, there you have it! Everything you need to bake incredible, flavorful Kalamata Bread right in your own kitchen. From mixing that simple dough to smelling that incredible aroma fill your home, and finally slicing into your beautiful, olive-studded masterpiece – it’s a truly rewarding experience.
Remember, baking bread is part science, part art, and all heart. Don’t stress if your first loaf isn’t perfect. Each time you bake, you’ll learn something new. The key is to enjoy the process and savor the delicious results.
I’d LOVE to see your baking triumphs! Did your loaf rise beautifully? What did you pair it with? share it in the comments below – let’s celebrate your homemade Kalamata Bread success together! Got any questions as you bake? Ask away! Happy baking!